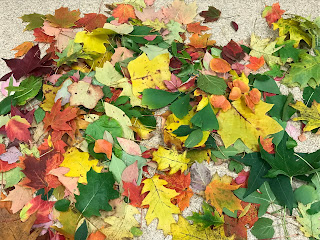
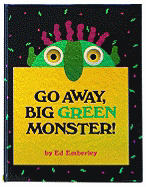
Though I love doing STEM-related programs, this year my co-worker and I decided to mix things up so that we could each do some science and some art, and this month I wanted to do a leaf art program because I love fall leaves, and I've wanted to do a leaf-collage program every since I first saw Lois Ehlert's Leaf Man several years ago.
These were my inspiration books, which I also displayed during the program:
Ages: 5-10
Time: 1 hour, though most kids were done within 45 minutes.
Number: I only had 11, but could have easily accommodated twice that.
Budget: $20
Materials:
- lots of leaves of assorted types, sizes, and colors, flat and not too dry
- glue
- paint brushes
- assorted googly eyes (optional)
- paper
- crayons
- table covering (I really like the disposable tablecloths that are paper on top with a plastic layer underneath) - $5 for package of 2
- small spray bottles - at least 3
- tempera or powdered watercolor paints
- heavyweight watercolor paper - package of 30 sheets for $9 (or other thick, absorbent paper, cardstock might work as well, or possibly better)
- paper towels
Activity #1 - Leaf Collage
2. Each participant was provided paper, glue, and a paintbrush for spreading the glue out in a thin layer. The leaves, extra paper, and assorted googly eyes were placed on a table behind them. I instructed them to just squeeze a little glue onto the paper, spread it out with the paintbrush, and then press a leaf into the glue, or for the larger leaves they could apply the glue to the back of the leaf.
3. This seemed to be the favorite and most satisfying of the three activities for most of the kids.
Activity #2 - Leaf Rubbings
A classic activity, and all you need are leaves, paper, and crayons! I sorted through our crayons and picked out all the ones that were already naked, but put out extra crayons in case there weren't enough or someone wanted a different color. I first demonstrated how to do it, showing you can do whatever combination of leaves and colors you like (interestingly enough, someone took my example paper home).
1. For this activity, it doesn't matter if the leaves are colored or not, so I just put out green leaves and saved the other colors for the collage table. Simply place your leaves face down (the veins are more pronounced on the underside) on the table, place a piece of paper over them, and rub over the leaf, holding a naked crayon horizontally. Start with light pressure and only increase pressure if necessary. Change direction to pick up all of the details. It helps to have someone hold the paper still, or to tape it to the table.
2. Experiment with different leaves and colors to get different effects.
Activity #3 - Negative & Positive Leaf Prints
This one was a bit messy! To prep, I covered the tables with disposable absorbent tablecloths with plastic backing (old newspapers would be great, too). Then I diluted liquid tempera paints with water in spray bottles, enough so that they would spray but no so much the paint wouldn't show up well on the paper. I just eyeballed it, but I would guess roughly 1 Tablespoon of paint to 1 Cup of water. Mix well.
*Make sure the nozzles are set for spray, not stream!
I put out heavy watercolor paper, 5 spray bottles of paint (in blue, green, red, yellow, & orange), assorted leaves (again, green is fine for this activity), and my practice example on the table. I also demonstrated for the kids before we started.
1. Pick out a few leaves with interesting shapes and arrange them on the paper.
2. *LIGHTLY* spray the paint, being sure not to hold the bottle too close to the paper. Spray from about a foot above the table, and slightly back from the paper. You want the paint to fall down on and around the leaves, not go under the leaves, to get the sharpest outline. Remember, LIGHTLY is the key word here! You can use more than one color on different areas, but if too many colors overlap, it will just look brown or gray.
3. Let it sit and soak into the paper for a few minutes. Then, place another piece of paper over it, and rub with fairly heavy pressure over where the leaves are, then gently peel the paper back. Carefully remove the leaves and discard. Any excess paint that is not absorbed can be carefully blotted off with a paper towel.
4. This will give you both negative and positive prints of your leaves. Some turn out better than others, in my case one of the kids ended up with a much nicer set than I got from my example above, and it takes a little practice. Some (most?) will have to learn the hard way that it really is necessary to use a light touch and not combine too many colors, so encourage them to do more than one.
How It Went
In all honesty, I was disappointed in the turnout; I really expected to have more than the usual 12-15, not less. I thought people would be all excited about fall and fall leaves, and was actually worried about having too many show up. I don't know if it was lack of interest, or the pull of the beautiful weather we had that day that kept people away. I think I should have played up the collage art more in the marketing, since that was clearly what most participants seemed to enjoy the most.
The collage and rubbings worked fine, and there were no issues there at all, but the print-making did not quite go as well as I'd hoped. I had ordered the special heavyweight watercolor paper thinking that it would readily absorb the paint and dry more quickly, but it didn't quite work that way. While it did absorb some, and once absorbed it dried very quickly, it took much longer than I expect to absorb.
I thought it would soak up the paint immediately, but instead the paint first beaded on top of the paper and only slowly soaked in, taking much longer than I expected. Also, when doing the positive print, the paint did not transfer as well to the watercolor paper as it did to a piece of cardstock I tried. If I were to do this again, I would definitely experiment more ahead of time with different papers to see if I could find one that worked better.
And, as I have frequently observed when I or anyone else had done a painting activity, people are too impatient to wait for their paintings to dry, and understandably don't want to take one that is still wet with them, and often leave them behind and never come back for them. Even though these dried much faster than most, and all were relatively dry by the end of the program (after blotting off excess), I found many left behind. I don't know if I will bother with any painting activities in the future as there is just too much waste.
Two of our participants found an unexpected guest that had been a stowaway on one of the leaves:
What I Would Do Differently
I think next time I would definitely do the collage and put more emphasis on it, but find some other way of making prints or a completely different activity instead, and find another activity in place of or in addition to the leaf rubbing, as there didn't seem to be as much interest or enthusiasm for that one, perhaps because it is one that can easily be done at home.


