Saturday, July 29, 2023

Shark Week! - Multiple Programs


Although I'm not particularly crazy about or interested in sharks, I did used to enjoy Discovery Shark Week back when it was still educational and not sensationalized crap, and I discovered when I did my very first Shark-themed storytime that it does make for some great programming. Last summer we did a whole week, and it was so fun and such a hit that we did the same this year, and for the first time in a while it luckily coincided with the Discovery channel Shark Week. 

I had the following shark-themed programs and passive activities (programs described below, with photos):

  1. Display of shark & other ocean-related books
  2. Scavenger hunt & coloring sheets
  3. Family Storytime
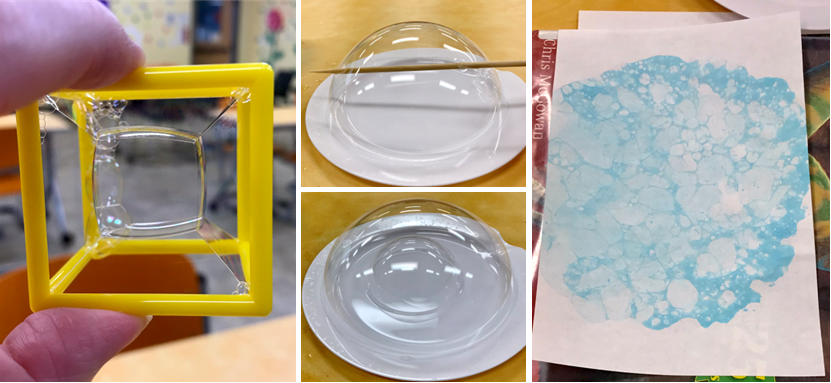
  4. Elementary Explorers (ages 6-10)
  5. Tween/Teen Shark Tooth Necklaces (ages 11-18)
  6. Newport Aquarium with Live Shark (all ages, best suited for ages 8 & up)

Family Storytime 
We sang "Slippery Fish", did "Two Little White Sharks" (modeled after "Two Little Blackbirds") with finger puppets, "Five Little Fishies Teasing Mr. Shark" with puppets, and read Shark In The Park (now available in boardbook, but I sure wish they would re-release in hardback!) by Nick Sharratt and Shark's Numbers by Harriet Evans. Afterward, we had a visit from Mr. Shark (a coworker in an inflatable shark constume), and I had a few activities: sensory bin with water beads and toy sharks, dot painting sharks & other ocean creatures, and walking the plank (balance beam) over shark-infested waters (cardstock fins taped to floor with waves drawn using chalk). The kids (and grown-ups!) had a blast.

Shark Week Storytime

Elementary Explorers 
This is the one I really wanted to highlight here, because it was SO easy and so much fun! It turned out to be my favorite program of the week. Knowing this would be the last week of summer and I would be running on fumes, I took the easy way out and ordered these cute "Pet Shark-in-a-Jar" kits from OT. They were a bit pricey ($2.84/ea), but so cute! 

I first booktalked a few shark-themed books, both fiction and non-fiction, then showed a short slide show with pictures and a few facts of around 8 of the more unusual shark species. I followed that with a brief shark trivia quiz. Then we began working on our pet sharks in jars. I supplemented what came in the kits with sand and some tiny shells I had leftover from making beach slime last summer, which really added a nice touch. I also offered shark origami corner bookmarks as an additional craft, with printed step-by-step instructions with photos and a QR link to video instructions. While they worked on their crafts I entertained/annoyed them with corny shark jokes. That morning before work a "What Shark Species Are You" quiz coincidentally (or not) showed up in my Facebook feed. I wasn't sure if the kids would be interested, but they loved it! As they finished up their crafts, they would come up one at a time, and I'd help them go through the quiz, then take their picture next to the TV screen with their result.

Shark Week activities for kids, pet shark in a jar,

I didn't have a huge turnout, as our numbers always drop by the last week, but it was nice have a smaller group for a change, more relaxed and calm, and those that came really enjoyed it. I was surprised at how much they liked the "What Shark Species Are You" quiz; one boy even made both his grandparents come in and take it, LOL!

Tweens & Teens 
Another easy program, making shark's tooth necklaces using waxed braided cotton cording, wooden beads, and pre-wired shark teeth. I did this same activity last summer with the younger kids, and it was a hit with all ages. I noticed a few kids wearing their necklaces the next day.

DIY shark tooth necklace


Newport Aquarium - Sharks
!
The week culminated with a shark program by the aquarium, complete with a live shark! I was a little hesitant to book them, because at a previous job when a coworker booked them we expected 200 people, and ended up with at least 600 and had to turn many away! I did advanced ticketing, with 125 tickets (the limit set by the aquarium) made available to be picked up started the Saturday before the program. Almost 90 tickets were given out that first day, with the last 37 going out Monday morning. We had about 20 no-shows, and 2-3 walk-in families we were then able to accommodate, so it worked out just right! 

Next year I'm going to have them bring sting rays!


And with that, my summer is done, other than doing the prize drawings and putting together some stats and a highlight video. I'm doing storytimes this week, then going on vacation and taking a programming break for the rest of August!


Saturday, July 22, 2023

Bubble Science - STEAM Program


Bubble Science


I did this fairly easy and relatively inexpensive STEAM program earlier this summer for ages 6-10, but some of the activities could be done with older or younger kids. 

Materials: 

  • bubble solution (I really like the Joyin concentrate, especially if you ever use bubble machines)
  • pipe cleaners
  • straws
  • skewers
  • plastic dixie cups (do not use paper, the bubble solution goes right through them)
  • small plastic plates
  • plastic drink bottles with the bottoms cut off (doesn't matter what kind or size, or if they are all the same or not, though I wouldn't use ones with wider openings at the top)
  • socks, or scrap pieces of fabric
  • rubber bands
  • food coloring
  • paper
  • bubble science kit (optional, but to me was worth the $10 to have a pre-made bubble cube and pyramid, and the booklet with suggested activities and other items came in handy as well); if you do not purchase the kit you would need to make your own bubble cube
Prep:  At each table, I placed 4 pipe cleaners, 4 straws of different colors, 4 skewers, and 2 small plates (I didn't have enough for everyone to have their own). Then I filled the small plastic cups with bubble solution, to be passed out once everyone was settled and ready to begin the activities.

Activity #1 - Surface Tension, Elasticity, & Shape 
  1. I instructed them to use a pipe cleaner to make a bubble wand with an angular opening, such as a square, triangle, star, or heart - anything but round - and see if they could blow a square, etc., bubble. 
  2. After determining that they could only make spherical bubbles regardless of the wand shape, I showed a brief slideshow about the science of bubble. I conveniently happened up one on the American Chemical Society website, saving me from having to make a PowerPoint myself.
  3. This showed how the bubble wall is made up of a bilayer of soap molecules with their hydrophobic tails facing outward and their hydrophilic heads pointing inward, with water sandwiched in the middle. We also discussed surface tension, which is why the bubbles are always spherical; elasticity, which is why the bubbles can stretch and grow bigger; and how the iridescent colors are from light bouncing off the bubbles and bubbles not having a uniform thickness.
Square bubble wand


Activity #2 - Skewer Challenge 
  1. I demonstrated how to use a straw to blow bubbles, and how to blow very gently to form a larger bubble that stays attached to the end of the straw, and let them practice until they got the hang of it.
  2. Then I showed them that I could pierce my bubble with a skewer without popping it (after dipping it in bubble solution without them seeing), then challenged them to do the same.
  3. Of course their bubbles all popped when pierced with a dry skewer.
  4. Then I let them in on the trick, and demonstrated how I had dipped my skewer in bubble solution first, which will allow the skewer to pierce the bubble without popping it, and even pass through to the other side.
Piercing bubble with skewer


Activity #3 - Bubble Clusters & Bubble Inception
  1. For this activity, I instructed them to pour some solution into the plate, then to blow bubbles using the straw onto the plate, and see what happens when bubbles connect. We observed that if the bubbles are very different in size, the larger bubble sometime absorbs the smaller one, making one larger bubble. But when bubbles are close to the same size, they attach, forming a wall in between. When many bubbles of similar size come in contact, the center one will end up in a hexagonal shape.
  2. Then we tried to see if we could blow one bubble onto the plate, and then blow more air into it to make it big enough to cover the entire center of the plate (we could).
  3. Next, we tried blowing a bubble inside of that bubble by dipping our straws in bubble solution, inserting it into the large bubble, then blowing. It was possible, but a little tricky keeping in the center so they wouldn't merge. Some of the kids were able to get one bubble inside, and I was able to go one more step and get a third bubble inside that bubble! 
  4. We all played around trying different things before moving onto the next activity.
Bubble inside a bubble


Activity #4 - Bubble Cube Demo
 

So, we already determined that bubbles are always spherical, right? Well, not exactly. They are always spherical when a single bubble is floating in air, but when they contact other surfaces, bubbles, or films, they do form straight walls.

Initially, my thought was to have them make their own bubble cube to do this trick, but after I spent the previous afternoon testing everything, I realized it would take too much time and likely be too difficult and frustrating for this age, and better suited for middle school and up, so I did it as a demonstration instead.
  1. Using the cube frame that came with the Bubble Science Kit, I dipped and rolled it in bubble solution until all 6 sides had soap films (or dunk it if you have a container of bubble solution deep enough).
  2. It would sometimes take a few tries, but I would carefully jiggle or tap the cube until I could get the films to join in the center.
  3. Using my straw dipped in bubble solution, I carefully blew a small bubble into the very center, resulting in a cube-shaped bubble! [Sometimes step 2 or even step 3 would happen spontaneously while rolling the cube in solution to coat.]
Bubble cube


Activity #5 - Bubble Painting 

Since you can't put bubble solution in paper bowls and I only had four plastic bowls, I set this one up as a station that they would take turns doing while others worked on the next activity, or continued to experiment with blowing bubbles. I put some solution into four bowls, and added a couple/few squirts of liquid food color into each [It took a fair amount, you'll just have to experiment until you get it right], and stirred to mix.
  1. First stir the solution well with your straw (the pigment tends to settle out).
  2. Put the end of your straw to the bottom of the bowl, and blow bubbles until there is a mound of bubbles above the top of the bowl.
  3. Carefully and slowly lower a piece of paper onto the bubbles, and continue lowering it until it almost touches the top of the bowl. Be sure to keep the paper taut and not let it sag in the middle or it will get down in the solution.
  4. Repeat with the same or multiple colors on different areas of your paper, if desired, then turn over and lay flat to dry (if the paper comes away with bubbles attached, it's fine; they will eventually pop).
  5. When dry, the colors are brighter and show up more, but if it's too light just add more color and try again. If the bubbles are popping too fast because the coloring has diluted the soap too much, simply add a spoonful or two of the concentrated bubble solution (or dish soap if making your own).
Bubble Painting


Activity #6 - Bubble Snakes! 
  1. I gave each participant a (clean) plastic drink bottle that had the bottom cut off, a sock, and a rubber band.
  2. I showed them how to cut the excess top of the sock off if needed, then to put the sock on the bottle, covering the open bottom.
  3. Then we secured the socks in place with a rubber band.
  4. To test them, we went outside!
  5. I poured bubble solution in a deep tray, and they dipped the sock-covered ends of their blowers in the solution, letting it sit a few seconds to absorb the first time.
  6. Then blow into the bottle!
  7. This produces many tiny bubbles attached to each other, creating a column of foam (aka "Bubble Snake")

    You could also do this using different types of fabric and comparing the results.
Bubble snakes


I gave them ziplock bags to take their bubble snake blowers and wands home in so as not to drip soap everywhere, a small tube of bubbles, and a sheet with three different bubble solution recipes to try at home (one with glycerin, one with corn syrup, and one with sugar) and a picture of the concentrated bubble solution I buy.

How It Went 

I didn't get a huge turnout, likely because (1) our number always drop in July, and (2) I had done the very popular family craft "No-Sew Sock Animals" the day before that had a big turnout, but still a decent number. It was kind of nice to have just a dozen or so kids for a change, too, so it was less noisy and less hectic. Once we got going, they really started getting into it, and everyone loved the bubble snakes in particular! I had just the right number and combination of activities to fill the hour time slot. Now, to find a use for all the bottle bottoms I cut off!

There are several other bubble activities you could do, such as trying out different homemade bubble solutions, testing a variety of everyday objects as bubble wands/blowers (turkey baster, apple slicer, cookie cutters, colander, strainer, slotted spoons, etc), making giant bubbles, and more. I tried making an opening in a soap film using a circle of thread with the intention of doing it as a demo, but I couldn't get it to last long enough when I tested it [I could get it to work briefly, but the string would quickly fall out of the film; I think I needed a finer thread.], so I decided not to do it this time. It would be a good activity for older kids (12+). (Here's another cool variation of that trick: https://youtu.be/8sJ2tkCdqkg.)

Pictured below: The kids had a blast with their Bubble Snake blowers out on the patio, and I love this stair-step picture of some of them standing along the retaining wall (only about 1-2 feet high). There was just a slight breeze, which sometimes would blow their growing snakes away, but if they were standing in just the right direction, it would instead support their growing snakes, allowing them to grow to about 3 feet long!

Bubble science, bubble snakes


Saturday, July 15, 2023

No-Sew Sock Animals - Family Craft Program


No-Sew sock animals


Last summer was my first SRP as the person in charge of planning the whole thing (and executing most of it), and though it was successful, I realized two things: (1) This community wanted and needed more family/all-ages programming, and (2) this did not include family movie days or family games days. So this year I added some family craft programs in addition to the big family events (paid performers, free mobile dairy classroom, and free truck event).

This "No-Sew Sock Animal" program was an easy, low-prep program, and turned out to be a huge hit with patrons. You only need a few supplies, and the only prep is to make a few examples, taking step-by-step photos, and putting together a sheet with step-by-step photos for participants to refer to (if you have time, include instructions, but I didn't, and no one had any trouble following just the photos).

Materials: 

  • Socks of various types, sizes, and patterns (I had fuzzy crew socks, brightly patterned knee socks, and some plain white crew socks I found, apparently leftover from some long-past program)
  • Polyfill stuffing (about 3 pillow-sized bags made about 50 animals) and/or rice (polyfill is cheaper & less messy)
  • elastic bands, rubber bands, twine, or yarn (I prefer the smaller elastic bands)
  • Sharpies or fabric markers (we used Sharpies)
  • Tacky craft glue (we used fabric glue, and it did NOT work)
  • Optional Embellishments: googly eyes, buttons, ribbon, yarn, pipe cleaners
  • Sheets with step-by-step photos for 3-4 animals

I selected 3 different animals to provide examples and directions for that were all pretty easy to do: caterpillar (easiest, no cutting), "soctopus" (moderately easy, only one section, but more cutting), and a rabbit (moderately easy, minimal cutting). You can find directions for several others, including bears and puppies, online that are a little more involved if you have an older audience. Though my program was technically for all ages, I knew with it being in the morning I would likely not get any teens. (I used the boring white crew socks for my examples in order to save the fuzzy and patterned socks for the kids.)

Caterpillar

No-Sew Sock Caterpillar

1. The patterned knee socks work really well for this one, though crew socks will also work. Pack the polyfill into the toe of the sock until it is as big as you want the head to be, making sure it is really packed and in a nice, round shape. Twist and tie off with elastic band or twine, making sure it is tight. 

2. Repeat, making each section slightly smaller than the one before, until you reach the end of the sock. 

3. If desired, twist a pipe-cleaner around the "neck" and shape into 'antennae'.

4. Use marker to add eyes and any other desired features, alternatively, glue on buttons or googly eyes.


Soctopus (yes, I included this just for the punny name 😉)

No-Sew sock animals, Soctopus

1. Pack polyfill into the toe of the sock, stretching the sock in order to make a large roundish head, and tie off. 

2. Trim off any excess length of sock if desired, then cut remining portion into eight tentacles.

3. Glue on (or draw) eyes, and draw any other facial features and details as desired.


Bunny

Unlike the caterpillar and soctopus, this one starts by making the bottom first and head last, and a crew sock works better than the longer knee socks for this one, IMO.

1. Fill the lower part of sock to make the desired size body (some preferred a round body, some preferred a slightly elongate body, and some desired a long body), then tie off. In order for the bunny to be able to sit upright, you will to at least partially fill the body first with rice for weight.

2. Fill the next section with polyfill to make a nice, rounded head and tie off.

3. Cut any excess length off the remaining portion (for ears that stand up, you will need to keep them shorter), then cut an elongated "v" shape from the center of the sock to form the two ears. Longer ears will be more floppy, and shorter ears more upright.

4. Pinch off a small portion and band/tie off to make the tail.

5. Add eyes and facial features as desired.

Optional: Pinch and tie off small pieces for paws. (I did not include this step, thinking best to keep it simple, but I saw several trying to glue on cotton balls or pom-poms to represent paw, and that didn't work well at all).


How It Went


I had a pretty big turnout for this program, 25 kids and 16 adults, and they all seemed to really enjoy it! They didn't have any trouble following the step-by-step photos, and got finished much faster than I expected. Since they were finishing so quickly and I had plenty of socks, I told them they could go ahead and make two if they wanted, and most did. There were a lot of cute animals made, lots of happy kids, and I got several compliments both at the end of the program, and later on social media when I posted pictures from the program. Our patrons rarely comment on our social media posts, so when they do take the time to leave a favorable comment about a program, you know it was a hit!

Note: the quality of sock does matter. I found that thicker socks are better in most cases, and in many cases smaller kids' socks would probably have worked better than the adult sized socks I purchased. Thick, fuzzy socks were the best choice for the bunnies, and the caterpillar is definitely the easiest and most forgiving design to make. 


Other Resources & Ideas