
I never outgrew my childhood fascination with dinosaurs, which is actually part of why I decided to take my current position as it is located in a state with lots of dinosaur fossil sites and trackways, and I work dinosaurs into my programs as often as I think I can get away with. Luckily, most kids love dinosaurs, so it's a win-win for everyone. When I saw that April 18th was "Velociraptor Appreciation Day", I figured that was as good an excuse as any to do a paleontology theme for my monthly STEM program.
This is a hybrid program that combines a take-home kit of supplies and a video presentation. The kit has a booklet with some basic info, QR links & URL's for the library's Facebook page and YouTube channel where the program can be viewed, very basic instructions for the activities, thought questions, and book suggestions and/or other resources for more information. The video component not only demonstrates the activities and provides an opportunity for asking questions, but usually has additional information presented. The program is usually for ages 6-10, but ages 3-5 would also be fine with this particular one, as long as they had an adult or older sibling assisting/supervising.
Materials Provided In Kit
- Instruction booklet

- 1 cup flour
- 1/2 cup salt
- 1 cup cornstarch
- 1 cup plastic container
- small amount of brown acrylic paint in paint pot
- 2 cotton swabs
- 2 small plastic dinosaurs
- 1 small plastic dinosaur skeleton


- 1-1/2 cup water, divided
- mixing bowl
- spoon or stiff spatula
- additional toy dinosaurs (optional)
- foil or baking sheet
- small tools for "digging"
- paintbrush
I started with a PowerPoint presentation to explain a little bit about the types of fossils and how they are formed, with photos of lots of different kinds of fossils: marine, plant, animal, and dinosaurs; including trace, cast, and permineralized fossils; and emphasizing some found in our state, with a map to point out some of the major fossil sites and trackways here. I also talked a little about how you become a professional or amateur paleontologist. Then I explained we were going to make our own simulated trace fossils and a DIY dinosaur dig.
Activity #1 - Simulated Trace Fossil In Salt Dough
2. Knead the salt dough until smooth, adding more flour if too wet or more water if too dry.
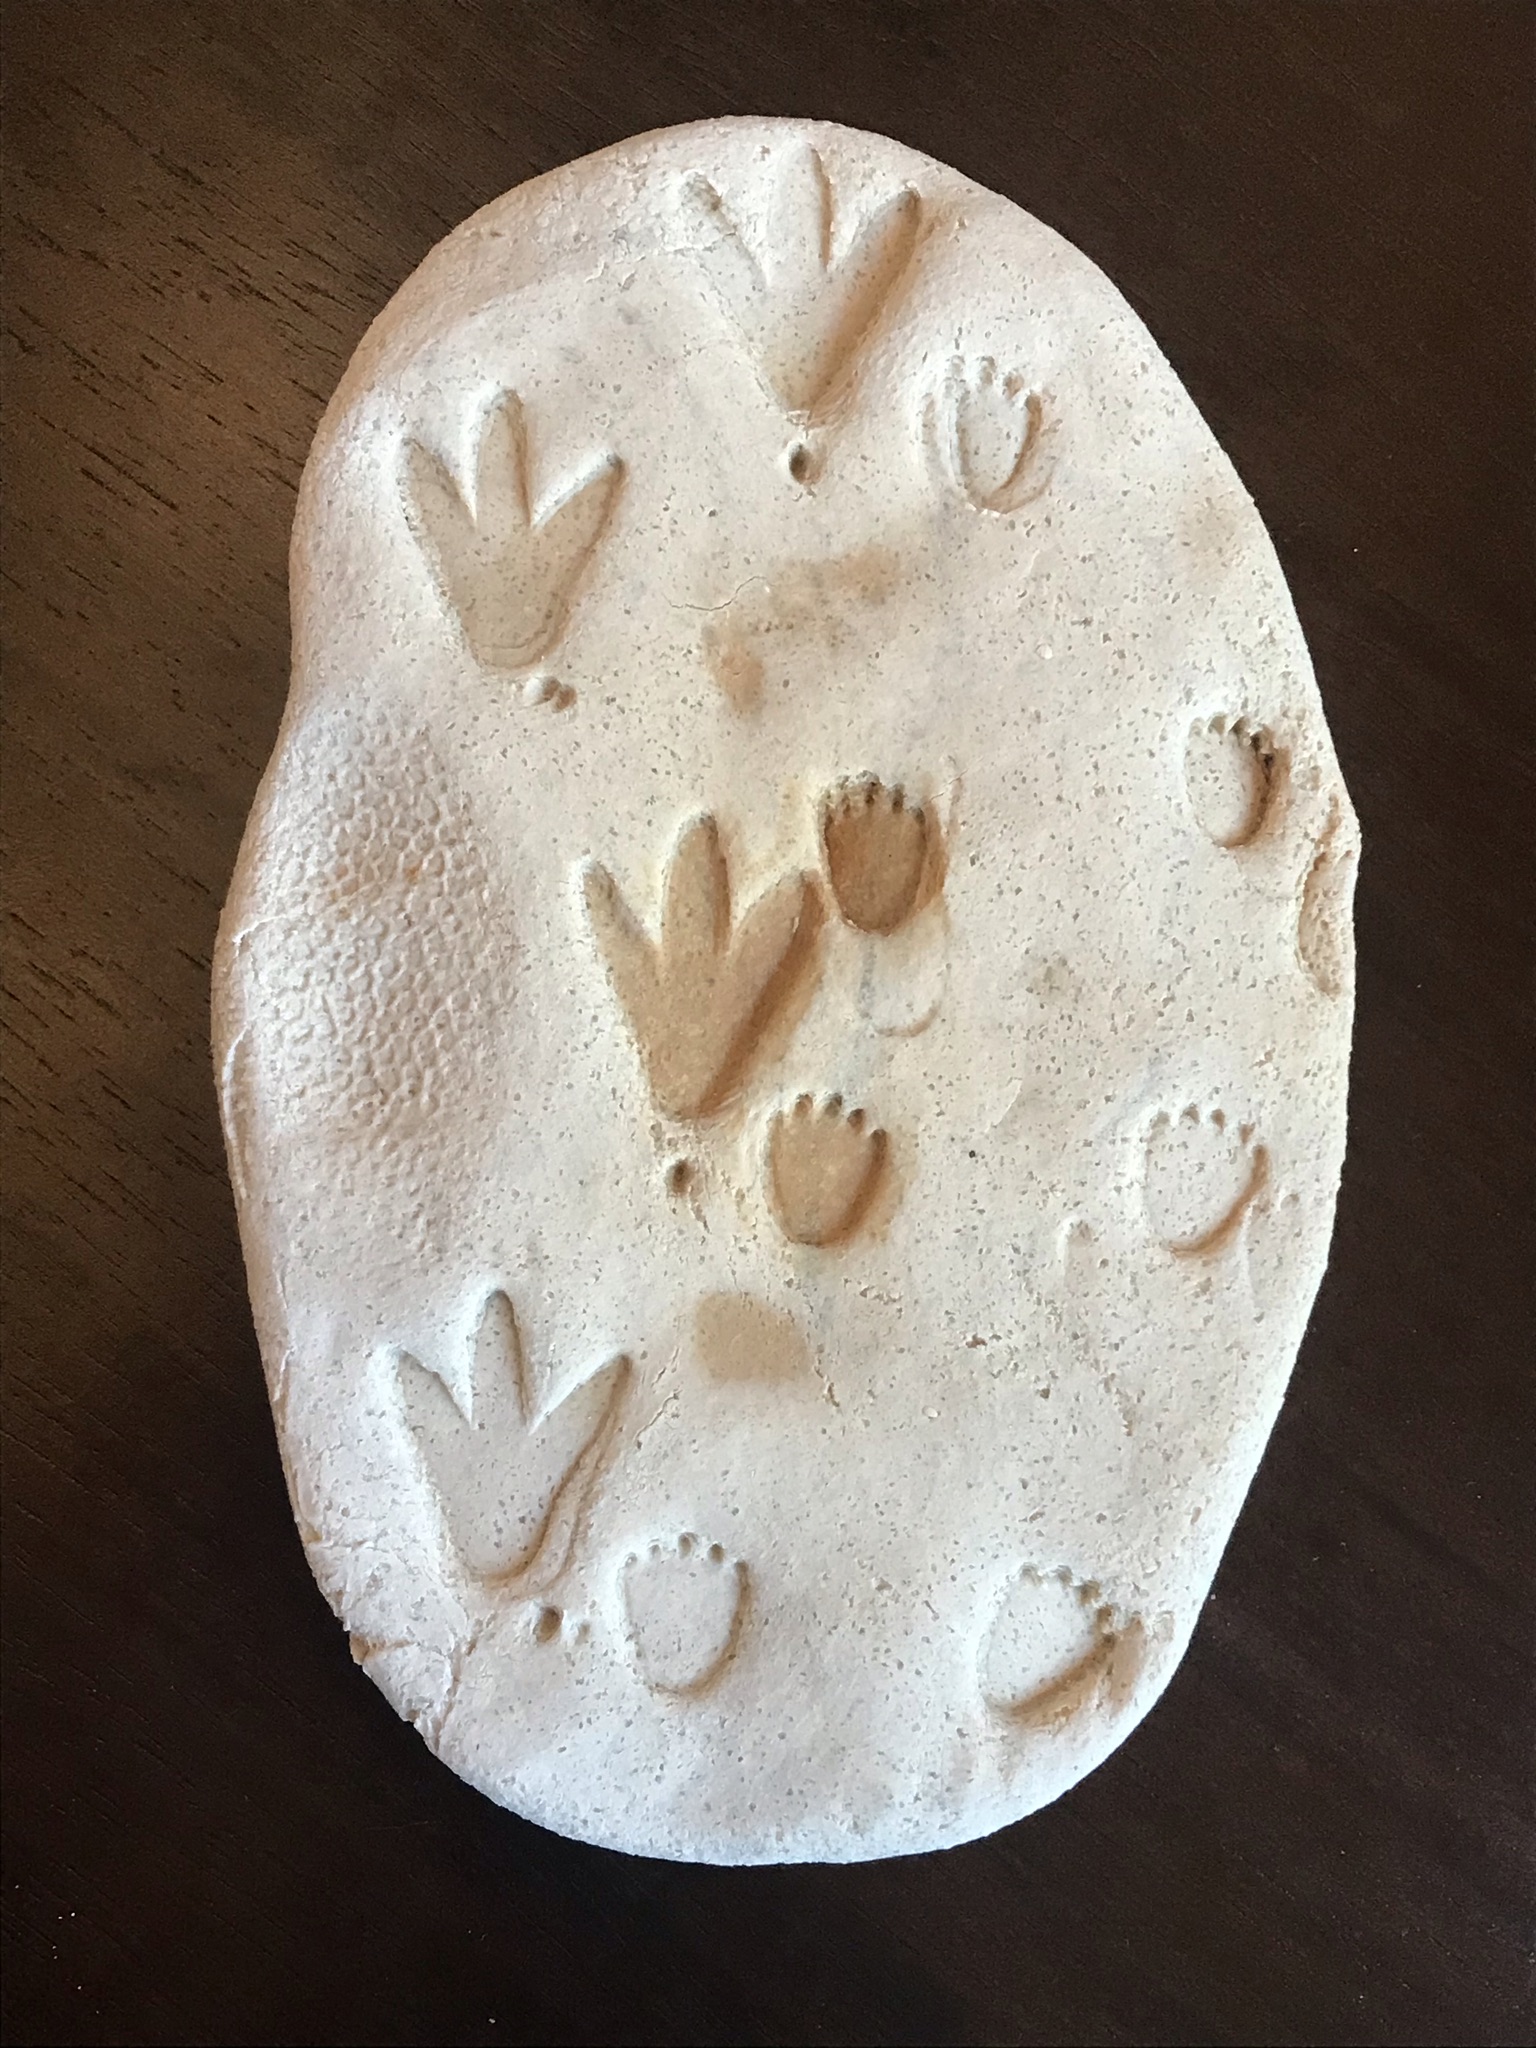
3. To make it look more rock-like, flatten slightly and use the cotton swabs to apply streaks of paint to the center of the dough, the fold dough over to seal the paint inside to avoid getting it on hands or surface. Knead the dough until the paint is worked in slightly, but still streaky to mimic the variations of natural stone.
4. Divide the dough in half, and pat or roll out one half until it's about 1/4" thick.
5. Use the provided plastic dinosaurs and skeleton, or your own toy dinos if you have some, and "walk" them across the dough to leave footprints. Use more than one if desired; you might also want to press their bodies into the dough to leave imprints of their skin.
6. When satisfied with your imprints, place the dough on a baking sheet and bake at 250 degrees for about 4 hours and let cool completely. Now it will be hard, simulating how real footprints are fossilized. (In an arid environment, air-drying might also work, but would several days.)
6. When satisfied with your imprints, place the dough on a baking sheet and bake at 250 degrees for about 4 hours and let cool completely. Now it will be hard, simulating how real footprints are fossilized. (In an arid environment, air-drying might also work, but would several days.)
7. Use the rest of the dough to make fossil footprints of a different dinosaur, or whatever you want. (Playing with dough is a great activity to work on strength and dexterity of the hands.)
Activity #2 - DIY Dinosaur Dig with Oobleck
1. Pour the 1 cup of cornstarch in the mixing bowl, and add 1/2 cup water.
2. Mix to combine. You will notice it feels and behave very strangely once it is all mixed, sometimes behaving as a solid, being hard to stir, "breaking" into dry clumps, but looking like a liquid and moving like a liquid otherwise.
3. Pick some up in you hand and quickly squeeze. It will feel like a hard, dry solid clump briefly, but when you open your hand it will become liquid and ooze through your fingers. This mixture has very unique properties and behaves as a solid when subjected to a strong, quick force, but behaving as a liquid when not stressed. This type of substance is known as a non-Newtonian fluid.
4. After you are done experimenting and observing the oobleck, pour it into the 1 cup container, then add the plastic skeleton. It should sink right in, but if it doesn't, give it a slight nudge.
5. Let it dry for 2-4 days or so. Drying time will depend on a few factors: how much water you added, the humidity of the surrounding air, and temperature. I am in a very arid climate, and mine was fairly dry after 24 hours, and a couple of hours in the sun sped it up. If you added too much water, it will eventually form a layer on top that can be carefully poured off (the one picture is just a little bit too dry).

6. Once the surface feels and looks very dry, loosen the sides and then turn it out onto a plate, tray, or foil pan and let dry for one more day. If it becomes too dry, it will crumble immediate and be too easy to dig out. Once you see the first hint of fine cracks, it is definitely ready; the one below is too dry.

7. Use small tools for digging out your dinosaur bones, such as a small precision flathead screwdriver, skewer or tooth picks, nut picks, plastic knife, and paintbrushes.

8. If you are careful to retain all the cornstarch, it can be re-used for oobleck and repeating the dino dig activity; just let it dry out completely then mix with another 1/2 cup of water.
The instruction booklet also directed them to the 567's to find more information about dinosaurs and paleontology, and to ask librarians for help locating dinosaur stories. It also listed some of the major sites in our state for seeing dinosaur fossils and trackways, as well as the two major museums in our area.
How It Went

The plastic dinosaurs ended up being a little too small to get really good footprints, so I advised them to use their own toy dinos if they had any. When I've done this in-person, I had larger dinos for them to use (but not keep).
Measuring out all the flour, salt, and cornstarch was very messy, so be prepared and do it in a room with an easy to clean floor. If anyone had seen my stash of baggies of white powder, they probably would have gotten the completely wrong idea of how I earn a living. I did make sure they were clearly labeled, of course. But it was kinda sketchy looking 🤣.
Measuring out all the flour, salt, and cornstarch was very messy, so be prepared and do it in a room with an easy to clean floor. If anyone had seen my stash of baggies of white powder, they probably would have gotten the completely wrong idea of how I earn a living. I did make sure they were clearly labeled, of course. But it was kinda sketchy looking 🤣.
No comments:
Post a Comment